Altair 8800 · Volume 14
Altair 8800 — Volume 14 — Building My Altair 8800 Replica
The capstone: opening the Altair-Duino kit, taking up the iron, and bringing a reproduction 1975 front panel of switches and lamps to life on my own bench.
14.1 About This Volume
Thirteen volumes of history and architecture lead to a soldering iron. Volume 13 traced the modern revival of the Altair 8800 — the replica family, the spectrum from pure emulation to genuine vintage silicon — and landed on one beloved object at the sweet spot of that spectrum: the Altair-Duino, Chris Davis’s kit, sold through his shop Adwater & Stir, an Arduino Due running David Hansel’s 8080 emulator behind a faithful reproduction of the Altair’s switch-and-lamp front panel. Volume 13 closed by handing the story off to the workbench, because the next chapter could no longer be told from the outside. This is that chapter. After a series spent describing the Altair from every angle but the one that matters most — owning one — the iron finally comes out, and the machine the whole series has been circling gets built, here, on the bench, by hand.
This is a build volume, and it is deliberately concrete. Where the earlier volumes explained what the Altair was and what the revival is, this one walks the actual process of turning a bare circuit board and bags of parts into a working front-panel computer: what arrives in the box, how it goes together, how the firmware and software are loaded, and what it is like to throw the switches for the first time and watch the lights answer. It is written as a build walkthrough — grounded in the publicly documented Altair-Duino assembly process — so that the steps and the feel of each stage are all here, ready for my own photographs and my own specific moments to drop in. The lights that Volume 4 wired and Volume 5 taught you to read are about to come up on a panel I soldered myself. Let us open the box.
14.2 The kit as it arrives
What lands on the bench is not an Altair; it is the promise of one, flat-packed. The Altair-Duino ships as a kit — a bare printed circuit board, or boards, and a set of small bags of components, with the panel overlay, the case parts, and a microcontroller already carrying the emulator. Opening it is the first ritual of the build: laying every part out on the bench, checking it against the parts list, and getting a feel for the scale of the job before a single joint is made. It is the same unboxing a 1975 buyer faced when the MITS kit arrived, half a century compressed — except that where the original buyer was about to wire a real 8080 computer, I am about to wire its face and let a modern chip be the computer behind it.
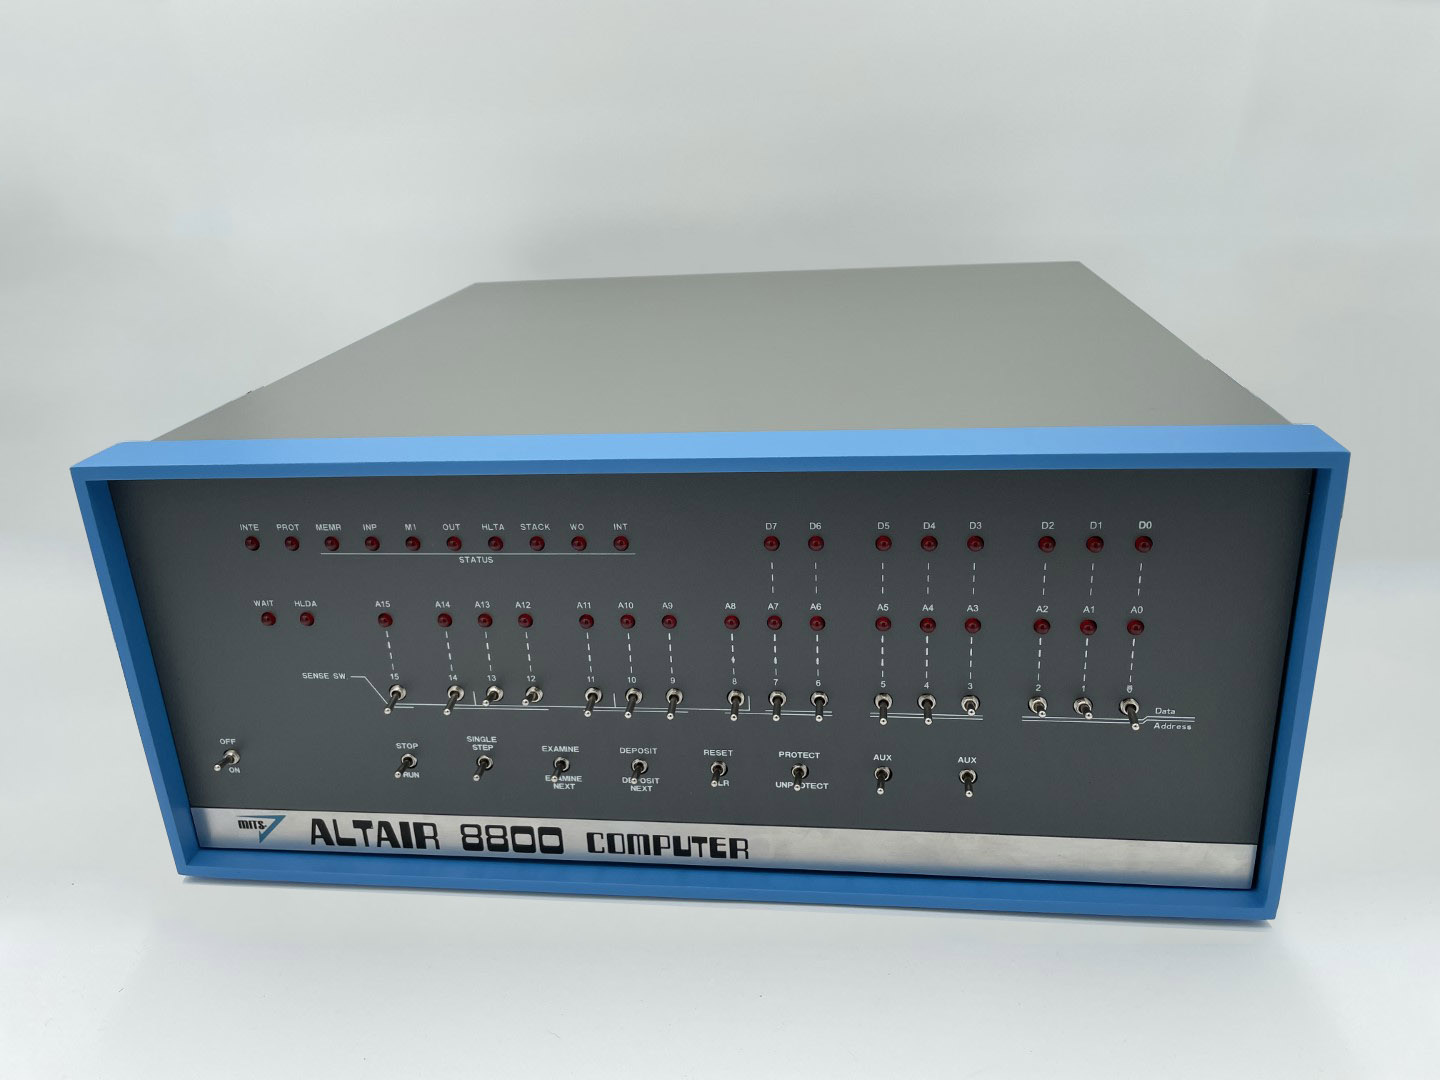
The largest and most important board is the front-panel PCB. This is the part that makes an Altair-Duino look like an Altair: it carries the rows of red LEDs that will become the address, data, and status lamps, and the bank of toggle switches — the address/data switches and the spring-loaded control switches (EXAMINE, DEPOSIT, SINGLE STEP, RESET, PROTECT, STOP/RUN) that Volume 5 drilled into muscle memory. In the kit these arrive as loose components: a tray of LEDs, a bag of switches, the bare board with its silkscreened legend already printed where the lamps and toggles will sit. The whole craft of the build is getting those LEDs and switches mounted onto that board square, true, and in the right places.
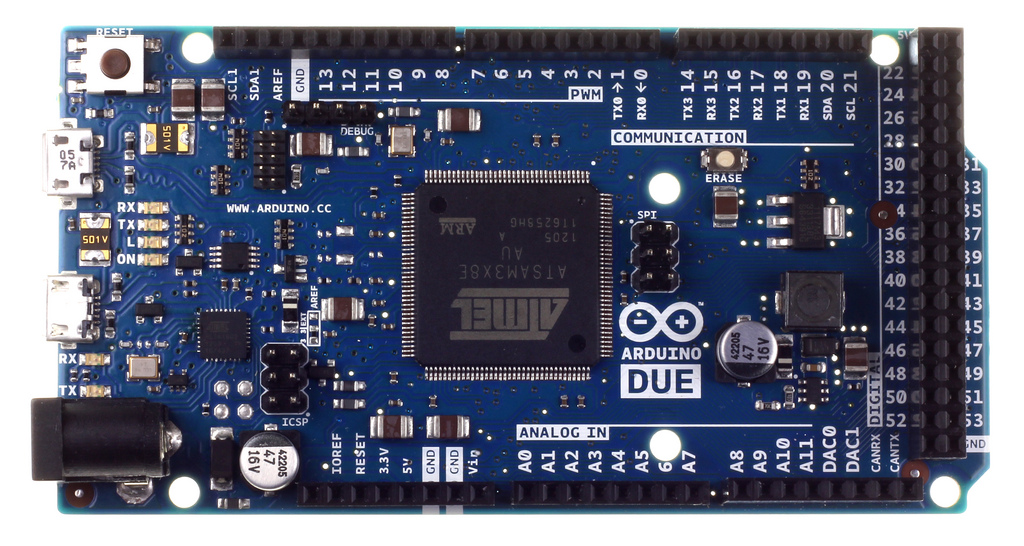
The brain of the machine arrives as a small, unremarkable blue circuit board: an Arduino Due. This is the part that does, in software, everything the original Altair’s rack of TTL logic and its Intel 8080 did in hardware. The Due is built around an Atmel SAM3X8E — a 32-bit ARM Cortex-M3 clocked at 84 MHz — and it is the chip that emulates the 8080, scanning the panel’s switches and driving its lamps at the same time, with cycles to spare. In most kit configurations the Due comes pre-programmed with David Hansel’s emulator already flashed, so that the microcontroller is, from the moment you unpack it, a working Altair waiting only for a panel to wear. The contrast Volume 13 savoured is right there in your two hands: a microprocessor that cost less than a paperback, doing the work of the machine that started the personal-computer revolution.
The rest of the box is the connective tissue and the body. There are headers and ribbon connections that mate the front-panel board to the Arduino Due — the wiring harness by which the emulated processor’s bus activity reaches the real lamps and the real switch settings reach the emulated processor. There is the panel overlay, the printed front face with the Altair’s legend that dresses the board into a recognisable Altair. And there is the enclosure: depending on the edition, a low-profile acrylic frame or, at the top of the range, a full-size reproduction of the Altair’s blue-and-grey case that makes the finished object a dead ringer for the 1975 machine on a shelf. A microSD card, pre-loaded with period software, completes the inventory.
It is worth being clear about which kit, because the Altair-Duino is sold as a tiered range and the choice shapes the build. The bare-bones Experimenter gives you the emulator and the bus without the full enclosure — the core experience for someone who wants the electronics and not the cabinetry. The standard edition adds the low-profile frame. The top-of-the-line Pro dresses everything in the full reproduction case and adds the extras: VT100 terminal emulation over VGA so a monitor can act as the Altair’s terminal, SD storage, and sound. And every edition is offered two ways — as a kit you solder yourself, or assembled and tested for those who would rather skip the iron entirely. Choosing the kit over the pre-built unit is choosing the building as part of the point, which — for a capstone whose entire argument is that the object must be made and owned, not merely run — is the only choice that fits.
14.3 The build: soldering the panel
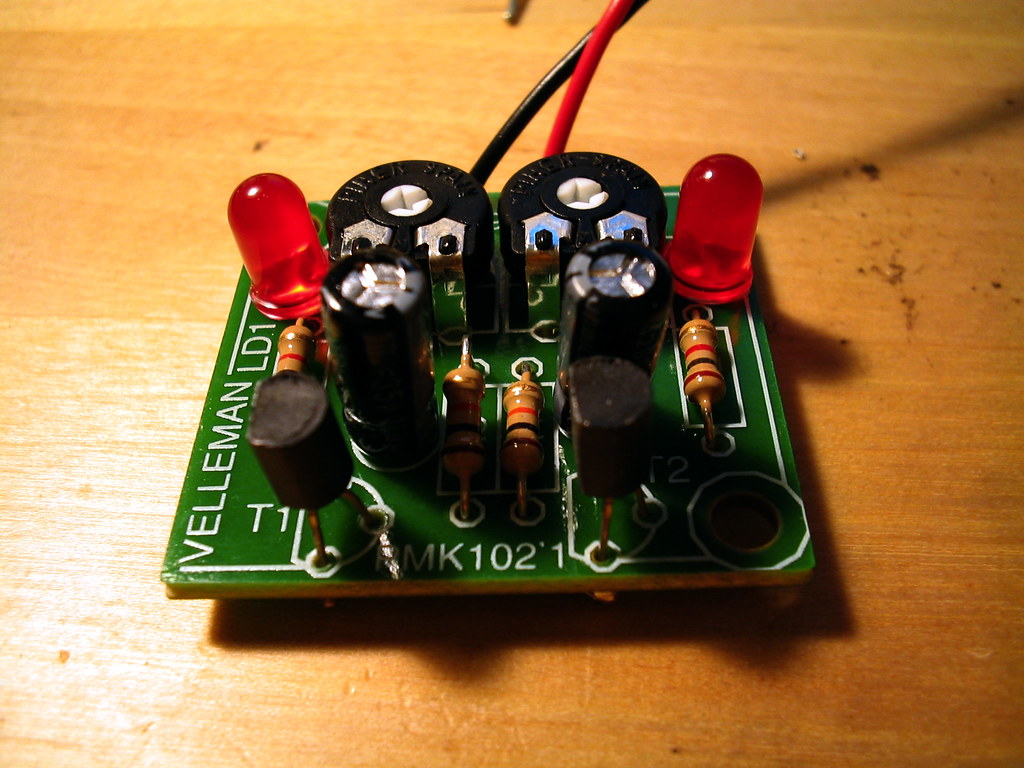
The heart of the build is soldering, and it concentrates on one board: the front panel. The Altair-Duino’s documented assembly guide walks the builder through it methodically, and the work divides into a few clear stages — the LEDs, the switches, the headers, and the marriage to the Arduino Due. None of it is exotic; all of it rewards patience and a clean, repeatable solder joint. This is, for most builders, an evening or two of careful work rather than a single marathon, and the difficulty sits squarely in the reach of a beginner who is willing to learn to lay down a good joint — which is precisely why the Altair-Duino broke through to a wide audience where harder, costlier replicas did not.
The build begins with the LEDs, because they set the visual truth of the whole panel and because getting them straight is the single most satisfying — and most exacting — part of the job. Each LED drops through its hole in the front-panel board, and before it is soldered it must be seated at a consistent height and standing perfectly upright, because once the panel overlay goes on, any lamp that sits crooked or proud of its neighbours will show. LEDs are also polarised: the longer leg is the anode, and every one must go in the right way round or that lamp will simply never light. The discipline here is to mount them in small batches, check the row for height and alignment against a straight edge before committing the iron, and only then solder — heat the pad and the leg together, feed a touch of solder, lift away, and move on. Repeat that across the address row, the data row, and the status cluster, and the bare green board starts, for the first time, to look like an Altair.
Then come the toggle switches — the bank that turns the panel from a display into an instrument. These are the genuine paddle switches Volume 13 made much of: not buttons pretending to be toggles, but real switches you throw with a finger, restoring the single most important physical fact of front-panel computing. Mounting them is the part of the build where square and true matters most, because a row of switches that drifts out of alignment is the flaw the eye catches first and the fingers feel every time. The technique is to fit the whole bank loosely, let the panel or a straight edge hold them in a true line, tack one pin on each switch, check the row, adjust while the single joint is still molten if anything has wandered, and only then solder the rest of the pins home. Get the alignment honest before committing, and the finished row of toggles is dead level — the difference, as with the LEDs, between a kit that looks home-made and one that looks like the real thing.
With the panel populated, the build turns to the headers and the Arduino mounting — the connections that join the face to the brain. Header pins and sockets are soldered so that the front-panel board and the Arduino Due mate cleanly, and the ribbon or pin connections that carry the bus between them are fitted. The Due itself is mounted to the assembly so that its pins line up with the panel’s wiring; the emulated 8080’s address, data, and status lines reach the right lamps, and the panel’s switch contacts reach the right input pins. This is the stage where a methodical builder slows down and double-checks orientation, because a header soldered in backwards or a connector seated a row off is the kind of mistake that is tedious to undo once the joints are made. The Altair-Duino’s assembly guide is explicit about sequence and orientation here, and following it step by step is the whole defence against that class of error.
Finally the mechanical assembly: fitting the populated panel board and its overlay into the enclosure, securing the boards, and closing up the case (with, on the Pro, its full reproduction shell). The microSD card of software goes into its slot. At this point the object on the bench has stopped being a heap of parts and become a machine — untested, unpowered, but whole. The build proper is done; what remains is to wake it up.
14.4 The software: firmware and the bundled world
A built panel is still inert without the program that makes the Arduino be an Altair, and that program is David Hansel’s Arduino Altair 8800 simulator — the open-source 8080 emulator (dhansel/Altair8800) that Volume 13 described as the engine under everything. In most Altair-Duino kits the Due arrives with this firmware already flashed, which means the software step can be as simple as powering on. But the firmware is not frozen: Hansel’s project is actively maintained, configurable, and open, and part of owning the build is being able to flash it yourself — to load the latest version, or to change configuration options — using the standard Arduino toolchain to upload the emulator to the Due over USB. Flashing it is the moment the bare microcontroller becomes, definitively, an 8080: every register, flag, and timing quirk of the original processor now living in the SAM3X8E, along with emulated disk drives, serial ports, and the sense switches.
The configuration that the firmware exposes is what lets one small board behave like a whole catalogue of Altair configurations. Hansel’s simulator models the front panel itself — tracking the address bus, the data bus, and the status flags exactly as the real machine drove its lamps — so the emulated processor’s activity dances across the panel I just soldered in the same places, in the same patterns, as it would have on a 1975 machine. Configuration options govern how much memory the emulated Altair has, what peripherals are attached, terminal behaviour, and which of the bundled disk images are mounted. Setting it up is, in effect, choosing which Altair to be on any given session — a 4K BASIC machine, a CP/M machine, a bare front-panel machine — without changing a wire.
And the bundled software is the reason the finished object is a whole working Altair rather than a panel that blinks decoratively. The kit ships with a microSD card carrying a library of period software, loaded as disk images and paper-tape images the emulator reads exactly as the original would have. At its centre is Altair BASIC — including the legendary 4K BASIC, the first product Microsoft ever sold, small enough to live in four kilobytes — alongside Microsoft’s later, larger BASICs and Altair DOS. There is a stack of CP/M and the classic CP/M applications the platform was built on — WordStar, SuperCalc, and their kin — so the machine can run the productivity software that defined the late-1970s microcomputer. And there are the games, among them the one this series cannot finish without: Kill the Bit, the 24-byte front-panel game of Volume 5, present and ready to run the way it was meant to be played. An entire software world arrives on a card the size of a fingernail.
14.5 Bring-up and first run
Bringing it up means the first power-on — the moment of truth that every builder approaches with a mix of confidence and dread, because this is when a cold solder joint, a reversed LED, or a misseated header announces itself. Power goes in; the panel is watched. A correctly built Altair-Duino comes alive the way the original did: the LEDs flicker through a power-on state and settle, the panel lit and waiting. If a lamp is dark that should glow, or a switch does nothing, bring-up becomes a short diagnostic loop — reflow the suspect joint, check the LED’s polarity, reseat the connector — and then power on again. When the whole panel lights clean and the switches respond, the build is verified: not just assembled, but working. The red lamps are glowing on the bench, exactly as Volume 13 promised they would by the weekend’s end.
And then comes the payoff the entire series has been pointing at — toggling in Kill the Bit by hand, on the real switches. This is the deliberate callback to Volume 5, and it is the test that no emulator window can offer, because here the switches are real and under my own fingers. The ritual is exactly the one Volume 5 set down. Actuate RESET to put the program counter at address 0. Set the address switches to the start, raise EXAMINE. Then spell the 24 bytes in, in octal, the way every Altair owner did: set the lower eight switches to the first byte — 041 — raise DEPOSIT; set the next byte, raise DEPOSIT NEXT, and walk forward through memory, 026 200, 001 016 000, the four 032s, 011, 322 010 000, 333 377, 252, 017, 127, 303 010 000, byte after byte, the rhythm of switches, DEPOSIT NEXT, switches, DEPOSIT NEXT settling into the hands just as it did in 1975. Proofread it with EXAMINE NEXT, comparing the data lamps to the listing. Then RESET, raise RUN — and the lit bit begins its march around the upper address LEDs.
Playing it is the proof made tactile. A single bit travels around the real address lamps; as it passes a position, I slap the matching sense switch — one of the upper toggles, read through input port 377 — and if the timing is right the XOR kills it. Miss, and the swarm grows. The whole game is played by watching the red lamps and throwing real switches, the panel turned into a reflex arcade machine with no screen and no controller but itself — on a machine I soldered together, running a program I toggled in by hand. Everything Volume 5 explained in the abstract is, here, happening on my own bench. The 24 bytes are no longer a listing; they are a thing my fingers entered and my eyes are reading off the lights.
Then, to close the loop on the other half of the series, I load Altair BASIC — and the contrast with the toggle-in ritual is the whole argument of Volumes 6 through 8 made physical. Where Kill the Bit went in switch by switch, BASIC comes up from the bundled software: configure the emulator to mount the BASIC image, connect a terminal (over the Pro’s VGA/VT100, or a serial terminal), and start the interpreter. The machine that a moment ago demanded octal and toggles now answers in something close to English. Type a line — PRINT 2+2, a short FOR loop, the 10 PRINT one-liner — and the Altair that I hand-fed 24 bytes is suddenly a computer you can converse with, Bill Gates and Paul Allen’s interpreter turning the toggling-and-octal machine into one that talks back. To run both on the same panel, in the same session — the bare-machine ritual and the BASIC conversation — is to feel the entire arc of the early personal computer compressed into an evening at my own bench.
14.6 The payoff: what the panel teaches that a window cannot
So why build it, when a free emulator already runs every byte of this software perfectly on any laptop? Volume 13 named the gap — between behaviour and object — and the finished build is where that gap closes in the hand. An emulator window reproduces the logic of the Altair and discards its entire physical form. You can click a picture of a switch with a mouse; you cannot throw it. You can watch a simulated lamp change colour in a rectangle of pixels; you cannot stand a real one on your bench, glance at it across the room, or hand the toggles to a visitor and watch them light up. The physical switch-and-lamp panel teaches what the window cannot precisely because it puts the experience back into the body: the firm mechanical throw of a paddle switch set to a one and pressed to deposit a byte; the specific dull-red glow of LEDs ranged behind a silkscreened legend; the way a running program is a flicker you feel rather than a value you read. Volume 5 argued the machine’s deepest lesson was tactile — a computer you learn by touching. You cannot learn that lesson through glass. You learn it by soldering the switches in straight and then throwing them.
There is a second thing the built panel teaches that even a pre-assembled one cannot, and it is the reason this is a kit volume and not a purchase volume. Because you mounted every LED and every switch yourself, the machine is yours in the way the 1975 owner’s was — earned, understood, owned down to the joint. Volume 5 said the friction of the bare machine was not incidental to the romance of owning an Altair; it was part of it, because you earned every result. Soldering the replica restores exactly that. The hours at the iron are not a tax on owning the panel; they are how the panel becomes yours rather than merely something you have. When the lamps come up for the first time on a board you populated, the feeling is not “the product works” but “I made this work” — the same feeling, across fifty years, that the original kit-builders described as one of the most thrilling things they ever did.
And so the series lands where it always meant to. Everything the fourteen volumes built toward converges here, on the bench: the 8080 and the passive bus of Volume 4, emulated now in an ARM chip; the toggle-in ritual and Kill the Bit of Volume 5, run by hand on real switches; the I/O boards and Teletype of Volume 6 and the Altair BASIC of Volumes 7 and 8, both alive on the same panel; the IMSAI and the wider micro world of Volumes 9 and 10; the homebrew, democratising ethos of Volume 11; the preservation and emulation of Volume 12; and the modern revival of Volume 13 that put the kit within reach. The machine that took the computer out of the corporate glass house and set it on a hobbyist’s bench is now, itself, a thing I built on a bench — its real switches under my fingers, its real lamps glowing in front of me, running the real Altair BASIC and the real Kill the Bit that this series spent thirteen volumes describing. The wheel comes full circle. The lights are up. That is where the Altair 8800 series ends: not with a photograph of the machine, not with a simulation of it in a browser tab, but with the thing itself — soldered, owned, and glowing on my own desk.
Sources
- Adwater & Stir (Chris Davis / Famous Davis LLC), the Altair-Duino product and assembly pages — confirms the Altair-Duino as Chris Davis’s kit: an Arduino-Due-based recreation of the Altair 8800 running David Hansel’s 8080 simulation behind a faithful reproduction front panel of toggle switches and LEDs; the tiered range (Experimenter, standard, Pro) sold either as solder-it-yourself kits or assembled-and-tested; the Pro’s full reproduction case, VT100/VGA terminal emulation, SD storage, and audio; the pre-programmed Arduino Due and the bundled microSD software (Altair BASIC including 4K BASIC, Altair DOS, Microsoft BASIC, CP/M programs such as WordStar and SuperCalc, and games). https://adwaterandstir.com/altair/ · https://adwaterandstir.com/product/altair-8800-emulator-kit/
- Adwater & Stir Altair-Duino assembly/build documentation (the kit’s step-by-step assembly guide) — confirms the documented build process this walkthrough follows: soldering the LEDs and the bank of toggle switches to the front-panel board, fitting the headers and ribbon/pin connections that mate the panel to the Arduino Due, mounting the Due, and assembling the enclosure; the methodical, sequence-and-orientation-sensitive nature of the work and its accessibility to a careful beginner (an evening or two of soldering). https://adwaterandstir.com/altair/
- David Hansel, “Arduino Altair 8800 Simulator,” Hackster.io (published January 2017) and the source repository
dhansel/Altair8800on GitHub — the open-source 8080 emulator the Altair-Duino runs, flashed to the Arduino Due: a cycle-approximate recreation emulating the Intel 8080 CPU and basic I/O (disk drives, serial ports, sense switches) while running genuine period Altair machine code and CP/M, and modelling the front-panel address/data/status indicators that drive the reproduction lamps. Confirms that the firmware targets the Arduino Due, is configurable, and is the open codebase a builder can flash and update. https://www.hackster.io/david-hansel/arduino-altair-8800-simulator-3594a6 · https://github.com/dhansel/Altair8800 - Arduino — Arduino Due technical documentation — confirms the Due’s core: an Atmel SAM3X8E, a 32-bit ARM Cortex-M3 microcontroller clocked at 84 MHz, the off-the-shelf hobbyist board on which Hansel’s emulator runs the 8080 fast enough to drive the panel in real time. https://docs.arduino.cc/hardware/due/ · https://en.wikipedia.org/wiki/Arduino_Due
- TechCrunch, “The Altairduino is the modern Altair replica of your dreams,” 26 Feb 2018 — independent write-up confirming the Arduino Due core, the toggle-switch-and-LED reproduction front panel, and the microSD card of period software (Microsoft BASIC, Altair DOS, CP/M, and games), framing the kit’s cycle-accurate emulation. https://techcrunch.com/2018/02/26/the-altairduino-is-the-modern-altair-replica-of-your-dreams/
- “Kill the Bit game by Dean McDaniel, May 15, 1975,” preserved by the Altair-clone project (altairclone.com) and retro-computing archives — the 24-byte octal listing toggled in during bring-up in this volume (
041 000 000 / 026 200 / 001 016 000 / 032 032 032 032 / 011 / 322 010 000 / 333 377 / 252 / 017 / 127 / 303 010 000), with gameplay reading the eight sense switches via input port 377 (octal). The same listing is verified in detail in Volume 5. https://altairclone.com/downloads/killbits.pdf - This series — Volume 13 (the Altair-Duino and the replica family, to which this volume is the hand-off and capstone), Volume 12 (emulation and preservation — the engine underneath the build), Volumes 11–9 (homebrew ethos, the IMSAI and the wider micro world), Volumes 8–7 (Altair BASIC and 4K BASIC), Volume 6 (the I/O boards and Teletype), Volume 5 (the toggle-in ritual, the front panel, and Dean McDaniel’s Kill the Bit), and Volume 4 (the 8080, the passive bus, and the front-panel hardware). This volume documents Jeff’s own Altair-Duino build and ends the fourteen-volume Altair 8800 series.
- Figure (placeholder): Altair-Duino front panel, photograph courtesy of Adwater & Stir, from the Altair-Duino 8800 Emulator Kit product page — stock placeholder to be replaced with Jeff’s own build photo. https://adwaterandstir.com/product/altair-8800-emulator-kit/
- Figure (placeholder): “kit3” by mrbill, licensed CC BY 2.0, via Flickr — a generic electronics-kit soldering scene standing in for Jeff’s own bench photos of soldering the front-panel board. https://creativecommons.org/licenses/by/2.0/ · https://www.flickr.com/photos/41894183508@N01/31059931
- Figure (placeholder): “File:ArduinoDue Front.jpg” by Arduino SA, licensed CC BY-SA 3.0, via Wikimedia Commons — an Arduino Due board standing in for a shot of the Due in Jeff’s own build. https://commons.wikimedia.org/wiki/File:ArduinoDue_Front.jpg
Comments (0)